Environment
1. Physical machine 2–linux2————Webcenter/Weblogic
2. Physical machine 3–linux3————Webcenter/Weblogic
Versions
1. Weblogic Server —-10.3.3
Directory Structure layout on linux2 & linux3
1. MW_HOME=/u01/oracle
2. WLS_HOME=$MW_HOME/wlserver_10.3
3. Admin Server—–/u01/admin/sample/aserver/sample (Admin Server is only on linux2)
4. Managed Server—-/u01/mserver/sample/sample
5. Apps —/u01/mserver/sample/apps
Admin & Managed Servers
Admin Server
1. sample_Admin Server —linux2
Managed Servers
1. sserver1 & sserver2—linux2
2.mserver1—linux2
3.mserver2—linux3
Clustering Type : Multicast
Clustered Name : mserver (mserver1 & mserver2)
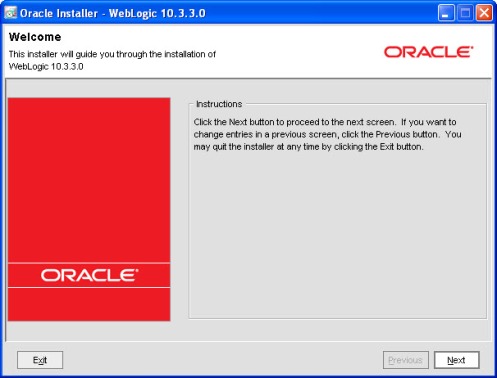
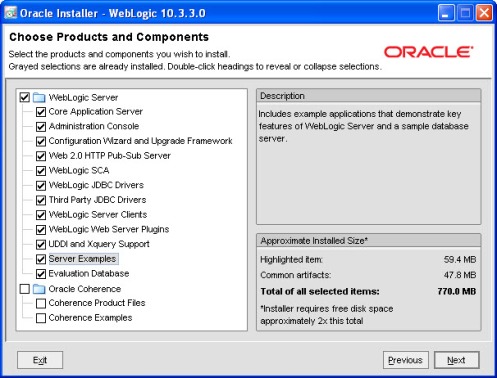
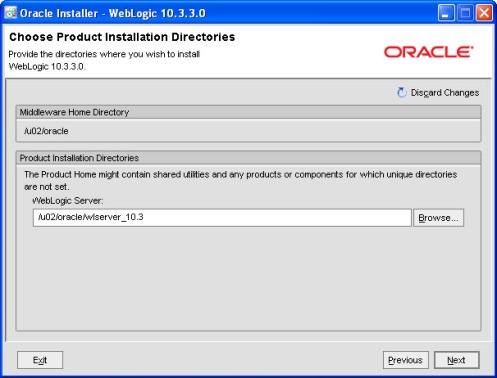
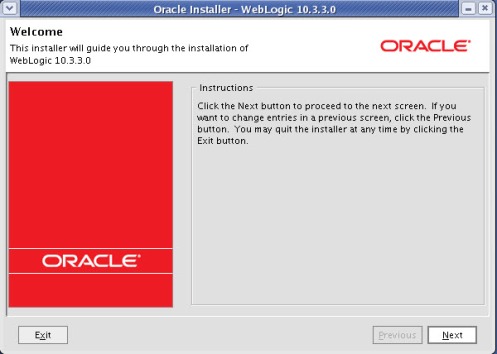
Step1 : Install weblogic server on linux2 & linux3.
Step2. Create Domain on linux2.
cd $MW_HOME/wlserver_10.3/common/bin
$ ./config.sh
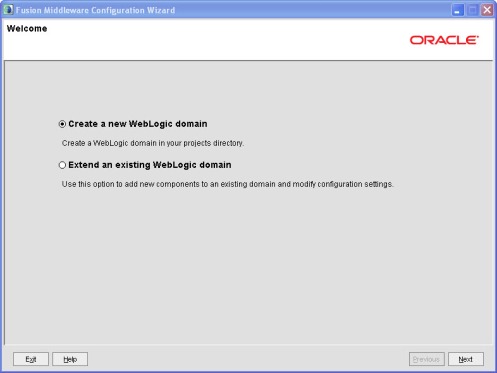
Select Create a new WebLogic Domain
Select Oracle JRF
Domain Name: sample
Domain location:/u01/admin/sample/aserver
Enter Weblogic Server Administrator username and password
1.Name :weblogic
Select Administration Server, Managed Servers,Clusters and Machines & Deployments
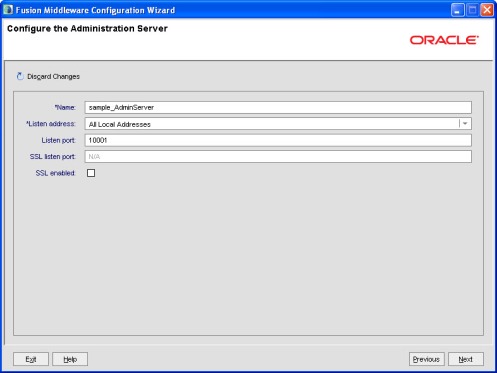
Administration Server
1. Name : Sample_AdminServer
2. Listen Address : All Local Address
3.Listen Port: 10001
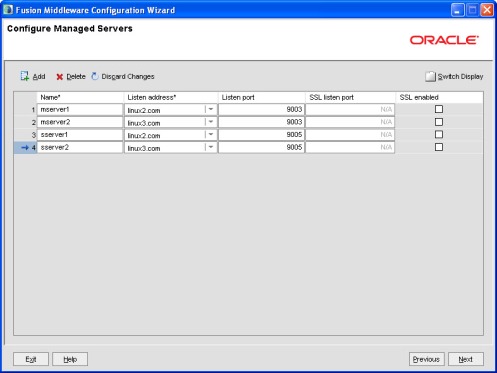
Managed Servers
1. mserver1:9003 & sserver1:9005 -linux2.com
2. mserver2:9003 & sserver2:9005-linux3.com
Clusters
1. mserver : multicast
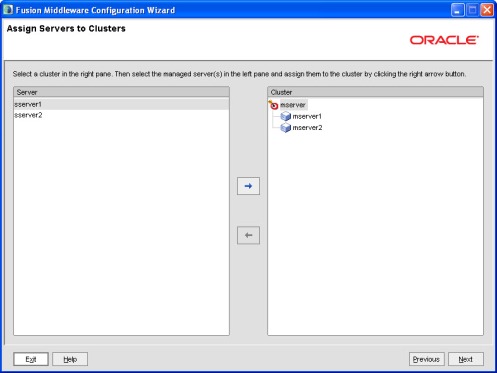
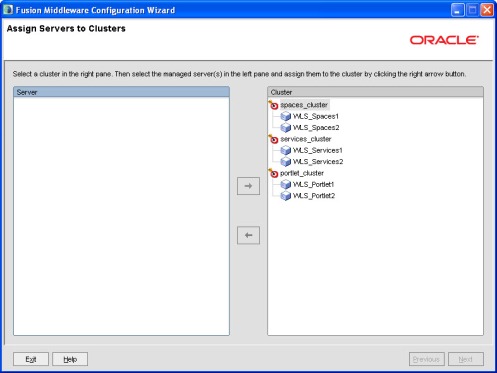
Assign Servers to Clusters
1. Cluseter: mserver–mserver1 & mserver2
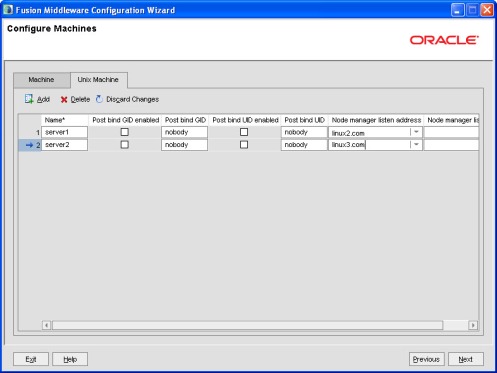
Configuring Machines
1.Server1: Node Manger Listener–linux2.com:5556
2.Server2:Nodemanager Listener–linux3.com:5556
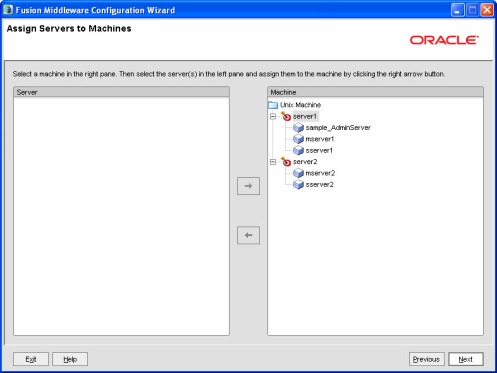
Assign Servers to Machines
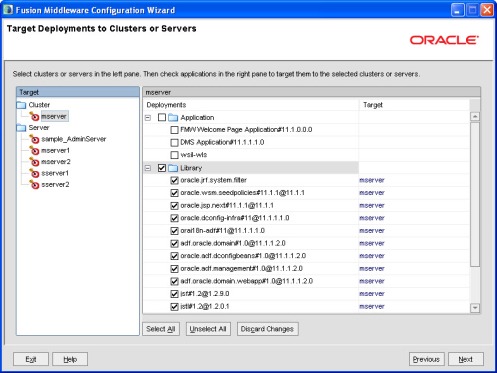
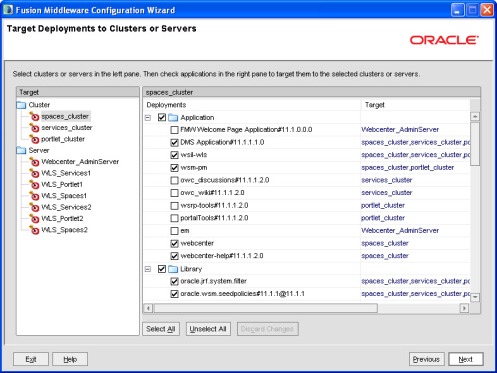
Target Deployments to Clusters or Servers
1. Cluster: mserver : select library to include jrf libraries in mserver cluster
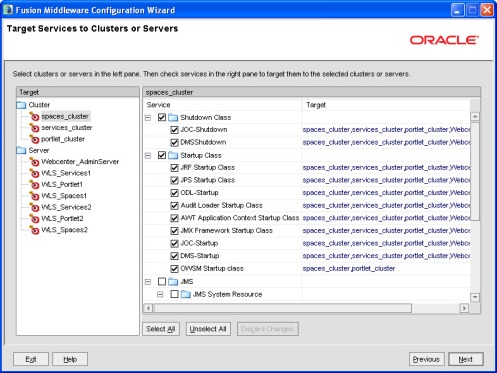
Target Services to Cluster or Servers
Configuration Sumamry
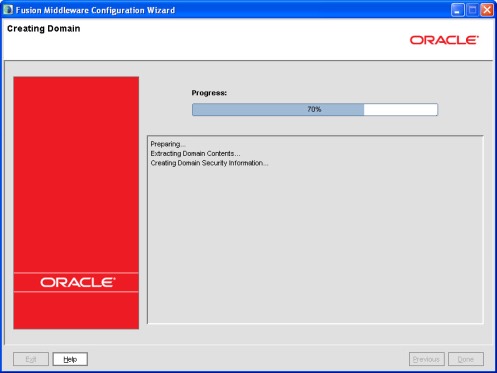
Creating Domain
Step 3. on linux2 : pack the sample domain using pack.sh
cd $MW_HOME/wlserver_10.3/common/bin
./pack.sh -managed=true -domain=/u01/admin/sample/aserver/sample -template=sample.jar -template_name=sample
< read domain from “/u01/admin/sample/aserver/sample”
>> succeed: read domain from “/u01/admin/sample/aserver/sample”
<< set config option Managed to “true”
>> succeed: set config option Managed to “true”
<< write template to “/u01/oracle/wlserver_10.3/common/bin/sample.jar”
……………………………………………………………………………………….
>> succeed: write template to “/u01/oracle/wlserver_10.3/common/bin/sample.jar”
<< close template
>> succeed: close template
Step 4. on linux2 . unpack the sample domain using unpack.sh
cd $MW_HOME/wlserver_10.3/common/bin
./unpack.sh -domain=/u01/mserver/sample/sample -template=sample.jar -overwrite_domain=true -app_dir=u01/mserver/sample/apps
<< read template from “/u01/oracle/wlserver_10.3/common/bin/sample.jar”
>> succeed: read template from “/u01/oracle/wlserver_10.3/common/bin/sample.jar”
<< set config option OverwriteDomain to “true”
>> succeed: set config option OverwriteDomain to “true”
<< set config option AppDir to “/u01/oracle/wlserver_10.3/common/bin/u01/mserver/sample/apps”
>> succeed: set config option AppDir to “/u01/oracle/wlserver_10.3/common/bin/u01/mserver/sample/apps”
<< set config option DomainName to “sample”
>> succeed: set config option DomainName to “sample”
<< write Domain to “/u01/mserver/sample/sample”
…………………………………………………………………………………..
>> succeed: write Domain to “/u01/mserver/sample/sample”
<< close template
>> succeed: close template
Step 5. secure copy the template sample.jar from linux2 to oracle@linux 3:/u01/oracle/wlserver_10.3/common/bin/
Step 6. on linux3. unpack the sample domain using unpack.sh
cd $MW_HOME/wlserver_10.3/common/bin
./unpack.sh -domain=/u01/mserver/sample/sample -template=sample.jar -app_dir=u01/mserver/sample/apps
./unpack.sh -domain=/u01/mserver/sample/sample -template=sample.jar -app_dir=u01/mserver/sample/apps
<< read template from “/u01/oracle/wlserver_10.3/common/bin/sample.jar”
>> succeed: read template from “/u01/oracle/wlserver_10.3/common/bin/sample.jar”
<< set config option AppDir to “/u01/oracle/wlserver_10.3/common/bin/u01/mserver/sample/apps”
>> succeed: set config option AppDir to “/u01/oracle/wlserver_10.3/common/bin/u01/mserver/sample/apps”
<< set config option DomainName to “sample”
>> succeed: set config option DomainName to “sample”
<< write Domain to “/u01/mserver/sample/sample”
…………………………………………………………………………………..
>> succeed: write Domain to “/u01/mserver/sample/sample”
<< close template
>> succeed: close template
Step 7. on linux2 & linux3 start the node manager.
cd $MW_HOME/wlserver_10.3/server/bin
nohup ./startNodeManager.sh &
Step 8. on linux2. Start the Admin Server
cd /u01/admin/sample/aserver/sample/bin
nohup ./startWebLogic.sh &
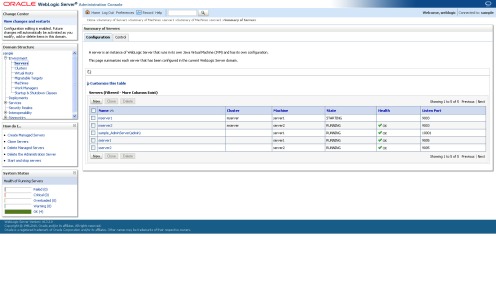
Step9 :Access the console of webloigc server http://linux2.com:10001/console and start the Managed Servers
Step 10 . Make sure Node manager on linux3. is reachable
 Step 11. Start the Managed Servers on linux2 and linux3.
Next : I will try to put more information on Load Balancing Techniques & proxy configuration
Related Links
1. Weblogic Server Installation
2. Configuring Oracle Single Sign-on for Weblogic Server
3. Weblogic Server Administrator password
4. Increasing the Heap Size in Weblogic Server
Environment
1. Physical Machine 1–linux1—–Database
2. Physical machine 2–linux2————Webcenter/Weblogic
3. Physical machine 3–linux3————Webcenter/Weblogic
Versions
1. Webcenter–11.1.1.3
2. Weblogic Server —-10.3.3
Directory Structure layout
1. MW_HOME=/u02/oracle (Shared)
2. WLS_HOME=$MW_HOME/wlserver_10.3 (Shared)
3. ORACLE_HOME=$MW_HOME/Oracle_WC1(Shared)
4. ORACLE_COMMON_HOME=$MW_HOME/oracle_common(Shared)
5. Admin Server—–/u02/admin/<Domain_Name>/aserver/<Domain_Name> (Shared)
6. Managed Server—-/u02/admin/<Domain_Name>/mserver/<Domain_Name>(Shared)
Step 1. Install Oracle Database 10.2.4 and load respository using rcu.
( rcu will run only from Windows or Linux Machine)
Step 2. Install Weblogic server 10.3.3 on linux2 and linux3.
Weblogic Server—WLS_HOME=$MW_HOME/wlserver_10.3
./wls1033_oepe111150_linux32.bin
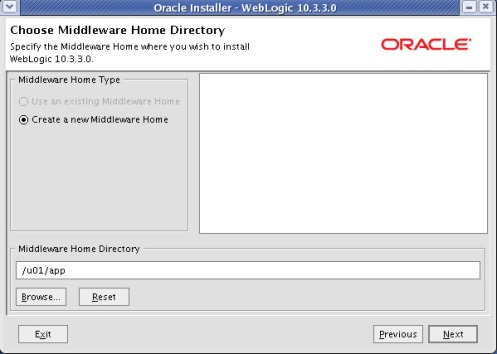
Create Middleware Home 1. Directory where weblogic server & other middleware software will be installed.
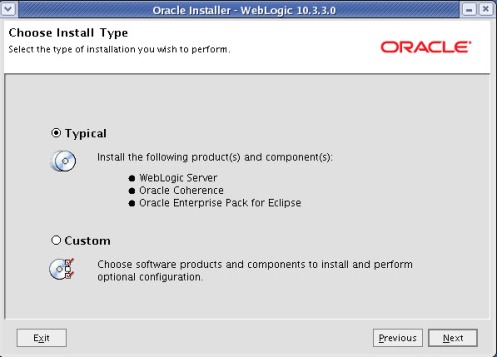
Select Custom Install.
If Coherence is not used it can be unselected here.
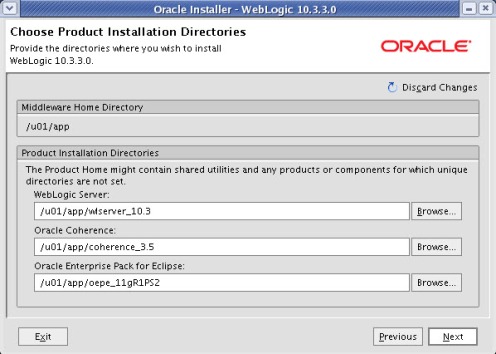
Specify the path where weblogic server will be installed.
Click Next.
Installation of web logic server Completed.
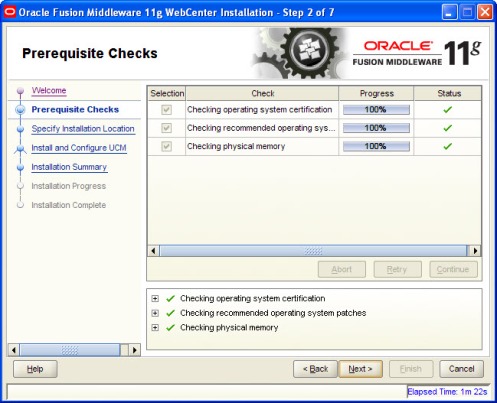
Step 3. Install Webcenter suite 11.1.1.2 on linux2 and linux3.
cd Disk1
./runInstaller
Specify Installation location of webcenter ( Weblogic server should be installed already).
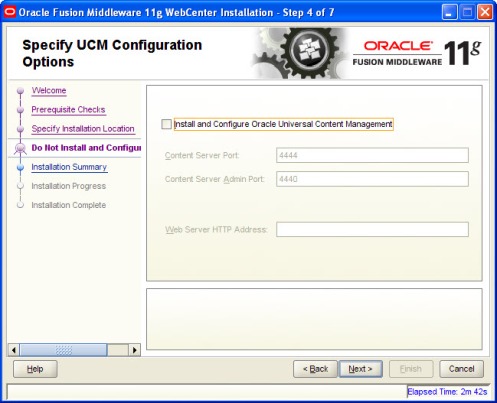
Optional Step : UCM can be configured with webcenter.
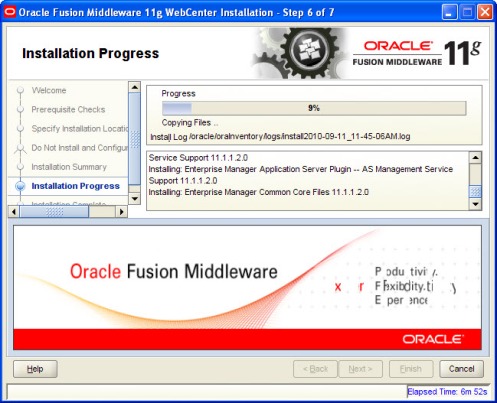
Configuration can be saved here.
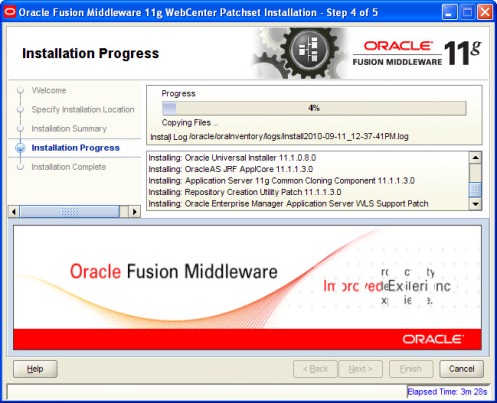
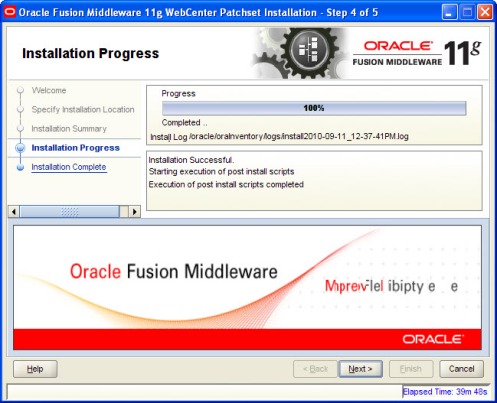
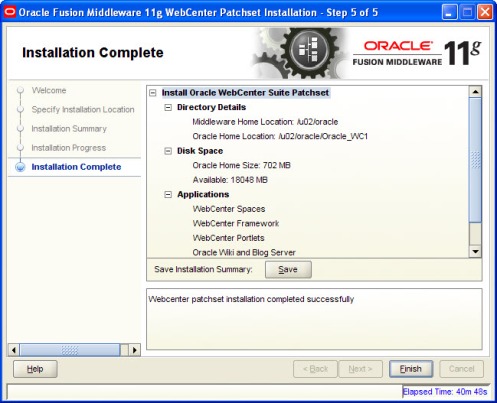
Step 4. Apply webcenter suite patch 11.1.1.3 to webcenter home on linux2 and linux3.
cd /staging/wcs/patch/Disk1
./runInstaller
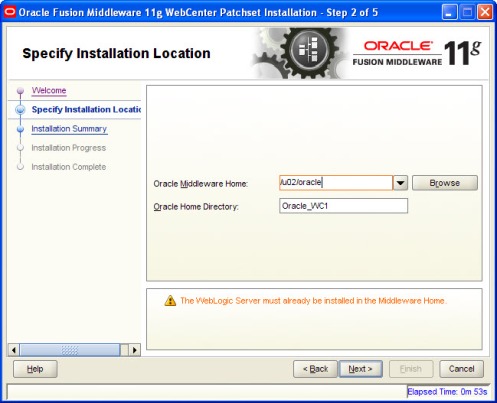
Specify the webcenter home details where the patch should be installed.
Patch is successfully applied to webcenter home.
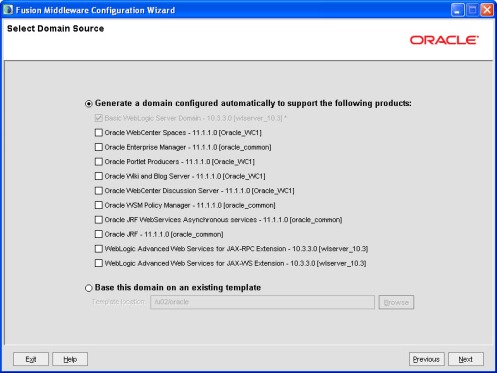
Basic weblogic domain creation is selected by default ( you can also select all the products required for webcenter. I would select webcenter components through extending the domain).
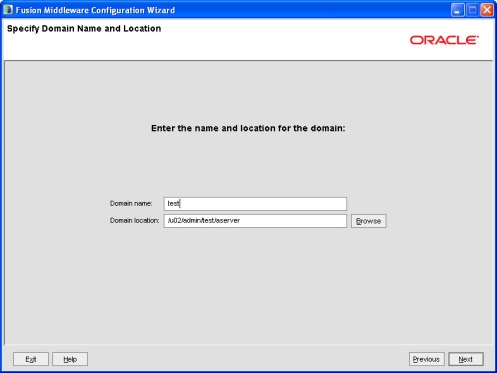
Creating Test Domain.
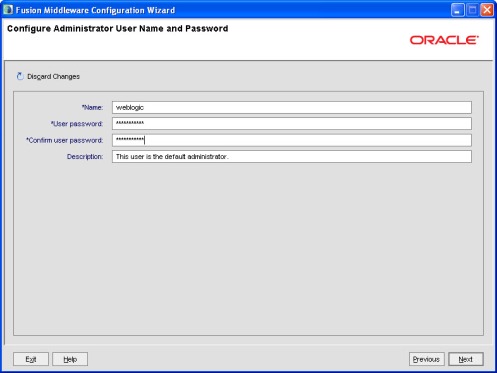
Enter the password for weblogic ( You can change the administrator name to whatever you like).
Select Administrator Server only.
1.Name of Admin Server can be changed here.
2. Listen Address is where admin server will listen you can put local address , local server IP ( managed through local node) or VIP(administaration failover).
3. Admin Server port can be changed here. ( Alternatively this can be done by editing config.xml).
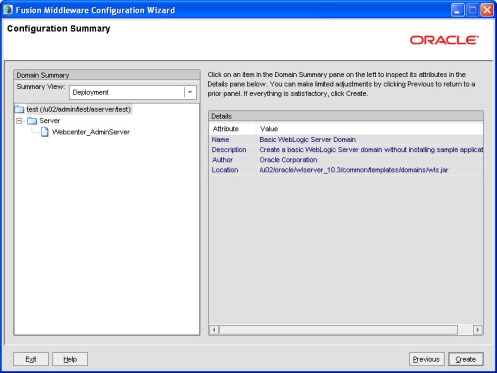
Creation of Test Domain with Webcenter_AdminServer listening at 7001.
Step 6. Extending Webcenter Domain.
cd $ORACLE_HOME/common/bin ( /u02/oracle/Oracle_WC1/common/bin)
./config.sh
select : Extend the Domain
select the test domain to extend for webcenter components. (/u02/admin/test/aserver).
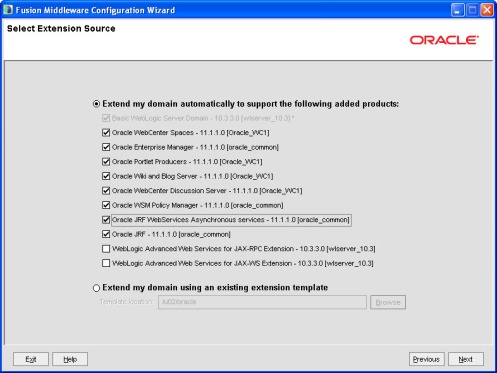
select the components required for webcenter.
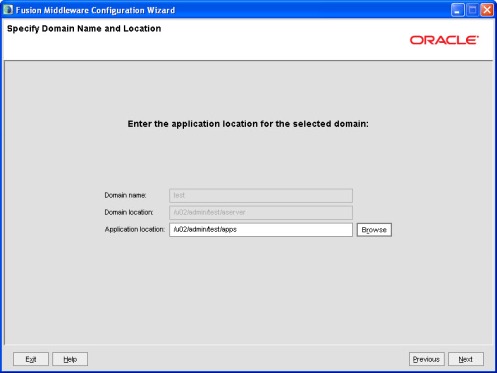
Select Application location : /u02/admin/test/apps
Connecting the domain with database schemas.
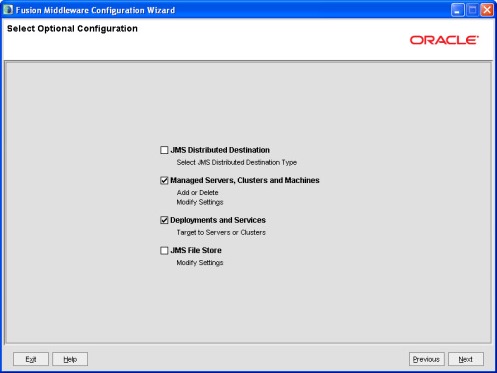
Select Managed Server, Clusters and Machines.
1.Change WLS_Services, WLS_Portlet & WLS_Spaces to WLS_Services1, WLS_Portlet1 & WLS_Spaces1
2. Point the above managed servers listen address to linux2.com(Local Node).
3. Add there more managed servers WLS_Services2, WLS_Portlet2 & WLS_Spaces2
4. Point the three created managed servers to linux3.com (Second Node).
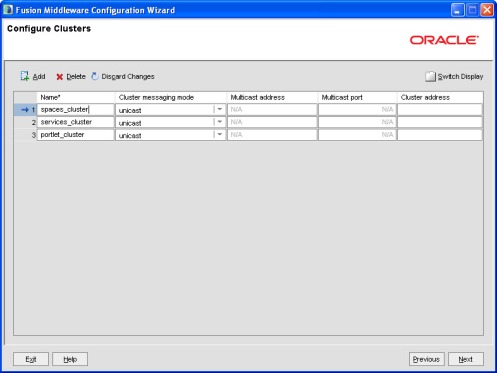
1. Create 3 clusters 1. Spaces_ Cluster 2. Services_ Cluster 3. Portlet_Cluster ( These clusters are created to cluster the managed servers created in previous step).
2. Clustering messaging mode : Unicast
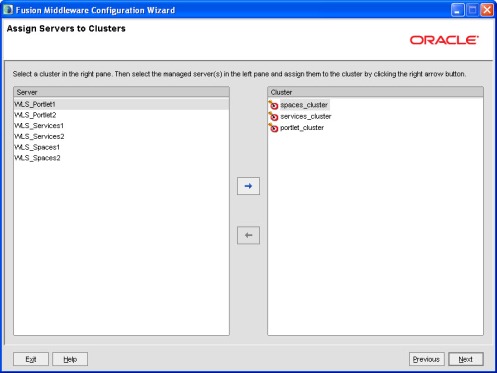
Clustering the managed servers.
1. WLS_ Spaces servers are assigned to spaces_cluster.
2. WLS_Services servers are assigned to services_cluseter.
3. WLS_Portlet servers are assigned to Portlet_cluster.
1. Create 2 machines 1. Server1 2. Server2 ( one machine for each physical node).
2. Server1 is assigned to local node.
3. Server2 is assigned to other cluster node.
Admin Servers are managed servers are assigned to their corresponding Machines.
select Applictions & Library against to cluster.
Select Startup & Shutdown classes against to cluster.
Configuration Summary.
Completed instalaltion.
Step 7. on linux2 pack the webcenter domain using pack.sh.
cd $MW_HOME/wlserver_10.3/common/bin
./pack.sh -managed=true -domain=/u02/admin/test/aserver/test -template=wctestemplateExtWC.jar -template_name=wc_test_templateExtWC
<< read domain from “/u02/admin/test/aserver/test”
>> succeed: read domain from “/u02/admin/test/aserver/test”
<< set config option Managed to “true”
>> succeed: set config option Managed to “true”
<< write template to “/u02/oracle/wlserver_10.3/common/bin/wctestemplateExtWC.jar”
……………………………………………………………………………………….
>> succeed: write template to “/u02/oracle/wlserver_10.3/common/bin/wctestemplateExtWC.jar”
<< close template
>> succeed: close template
Step 8. on linux2 & linux3 unPacking the webcenter domain using unpack.sh
This Post will deal with configuring Oracle Single Sign on (SSO) with Webcenter suite
Prerequisites
You should have already installed
1. Oracle HTTP server 2.0
2. Oracle Webcenter Suite 11.1.1.3
3. Oracle SSO 10.1.2 or 10.1.4
Here I installed Oracle HTTP Server on linux2, Webcenter Suite on linux1.
I am going to use below configuration
Ports
| Server Name | Context Root |
Weblogic Port |
HTTP Server Port |
| Admin Server | /console, /em | 7001 | 7777 |
| WLS_Spaces | /webcenter | 8888 | 7778 |
| WLS_Portlet | /richtextportlet, wsrp-tools, portal-tools | 8889 | 7779 |
| WLS_Services | /owc_discussions, /owc_wiki | 8890 | 7780 |
URL’s for accessing Webcenter directly through weblogic server port
| Webcenter Spaces | http://linux1.com:8888/webcenter |
| WebCenter Rich Text Portlet | http://linux1.com:8889/richtextportlet/ |
| WebCenter WSRP Tools | http://linux1.com:8889/wsrp-tools/ |
| WebCenter OmniPortlet and Web Clipping Portlets | http://linux1.com:8889/portalTools/ |
| WebCenter Discussions | http://linux1.com:8890/owc_discussions |
| WebCenter Wiki and Blog Server | http://linux1.com:8890/owc_wiki |
| Console | http://linux1.com:7001/console |
| em | http://linux1.com:7001/em |
URL’s for accessing Webcenter through HTTP server port
| Webcenter Spaces | http://linux2.com:7778/webcenter |
| WebCenter Rich Text Portlet | http://linux2.com:7779/richtextportlet/ |
| WebCenter WSRP Tools | http://linux2.com:7779/wsrp-tools/ |
| WebCenter OmniPortlet and Web Clipping Portlets | http://linux2.com:7779/portalTools/ |
| WebCenter Discussions | http://linux2.com:7780/owc_discussions |
| WebCenter Wiki and Blog Server | http://linux2.com:7780/owc_wiki |
| Console | http://linux2.com:7777/console |
| em | http://linux2.com:777/em |
Step 1. Download and Configure MOD_WEBLOGIC
a. Download MOD_WEBLOGIC from http://download.oracle.com/otn/bea/weblogic/server103/server103_apacheplugins.zip.
b. extract the corresponding platform mod_wl_20.so. Copy it to $ORACLE_HOME/ohs/modules.
c. Edit $ORACLE_HOME/ohs/conf/httpd.conf and add the following line under the last LoadModule directive: LoadModule weblogic_module modules/mod_wl_20.so
Step 2. Configuring Webcenter suite with OID.
Check Configure OSSO Identity Asserter section from
Step 3. Registering HTTP server URL’s with SSO server.
Ex.
$ORACLE_HOME/sso/bin/ssoreg.sh -oracle_home_path $ORACLE_HOME -site_name linux2.com -config_mod_osso TRUE -mod_osso_url http://linux2.com:7777 -remote_midtier -config_file $ORACLE_HOME/Apache/Apache/conf/osso/console_osso.conf -verbose TRUE
| OSSO Configuration Files |
|
| Spaces | spaces_osso.conf |
| Portlet | portlet_osso.conf |
| Services | services_osso.conf |
| Console | console_osso.conf |
b. Move the above generated configuration files to the server where HTTP server is running ie linux2 $ORACLE_HOME/ohs/conf/osso
Step 4. Build Virtual Host in httpd.conf located $ORACLE_HOME/ohs/conf
Creating Virtual Host involves 1. Creating Includes files in httpd.conf 2. Adding Weblogic & OSSO directives
I created four Include files . Add below lines in httpd.conf
1. Spaces ———-$ORACLE_HOME/ohs/conf/wcspaces.conf
2. Portlet———-$ORACLE_HOME/ohs/conf/wcportlet.conf
3. Services——–$ORACLE_HOME/ohs/conf/wcservices.conf
4. Console———$ORACLE_HOME/ohs/conf/wcconsole.conf
$ORACLE_HOME/ohs/conf/wcspaces.conf
XXXXXXXXXXXXXXXXXXXXXXXXXXXXXXXXXXXXXXXXXXXXXXXXXXXXXXXX
VirtualHost *:7778>
ServerName linux2.com
<IfModule mod_weblogic.c>
WebLogicHost linux1
WebLogicPort 8888
<Location /webcenter>
SetHandler weblogic-handler
</Location>
</IfModule>
LoadModule osso_module modules/mod_osso.so
<IfModule mod_osso.c>
OssoIdleTimeout on
OssoIpCheck off
#OssoRedirectByForm off
#OssoSecureCookies on
#OssoProtectedOnly on
#OssoSecureCookies on
#OssoSendCacheHeaders on
OssoSendCacheHeaders off
#OssoHttpsFrontend on
#UseWebCacheIp on
OssoConfigFile /u01/ohs/ohs/conf/osso/spaces_osso.conf
<Location /webcenter>
require valid-user
AuthType Basic
</Location>
<Location /private>
require valid-user
AuthType Basic
</Location>
</IfModule>
#
# If you would like to have short hostnames redirected to
# fully qualified hostnames to allow clients that need
# authentication via mod_osso to be able to enter short
# hostnames into their browsers uncomment out the following
# lines
#
#PerlModule Apache::ShortHostnameRedirect
#PerlHeaderParserHandler Apache::ShortHostnameRedirect
</VirtualHost>
$ORACLE_HOME/ohs/conf/wcportlet.conf
==============================================
<VirtualHost *:7779>
ServerName linux2.com
<IfModule mod_weblogic.c>
WebLogicHost linux1.com
WebLogicPort 8889
<Location /richtextportlet>
SetHandler weblogic-handler
</Location>
<Location /wsrp-tools>
SetHandler weblogic-handler
</Location>
<Location /portalTools>
SetHandler weblogic-handler
</Location>
</IfModule>
LoadModule osso_module modules/mod_osso.so
<IfModule mod_osso.c>
OssoIdleTimeout on
OssoIpCheck off
#OssoRedirectByForm off
#OssoSecureCookies on
#OssoProtectedOnly on
#OssoSecureCookies on
#OssoSendCacheHeaders on
OssoSendCacheHeaders off
#OssoHttpsFrontend on
#UseWebCacheIp on
OssoConfigFile /u01/ohs/ohs/conf/osso/portlet_osso.conf
<Location /richtextportlet>
Require valid-user
AuthType Basic
</Location>
<Location /wsrp-tools>
Require valid-user
AuthType Basic
</Location>
<Location /portalTools>
Require valid-user
AuthType Basic
</Location>
<Location /private>
require valid-user
AuthType Basic
</Location>
</IfModule>
#
# If you would like to have short hostnames redirected to
# fully qualified hostnames to allow clients that need
# authentication via mod_osso to be able to enter short
# hostnames into their browsers uncomment out the following
# lines
#
#PerlModule Apache::ShortHostnameRedirect
#PerlHeaderParserHandler Apache::ShortHostnameRedirect
</VirtualHost>
$ORACLE_HOME/ohs/conf/wcservices.conf
===================================================================
<VirtualHost *:7780>
ServerName linux2.com
<IfModule mod_weblogic.c>
WebLogicHost linux1.com
WebLogicPort 8890
<Location /owc_discussions>
SetHandler weblogic-handler
</Location>
<Location /owc_discussions>
SetHandler weblogic-handler
</Location>
</IfModule>
LoadModule osso_module modules/mod_osso.so
<IfModule mod_osso.c>
OssoIdleTimeout on
OssoIpCheck off
#OssoRedirectByForm off
#OssoSecureCookies on
#OssoProtectedOnly on
#OssoSecureCookies on
#OssoSendCacheHeaders on
OssoSendCacheHeaders off
#OssoHttpsFrontend on
#UseWebCacheIp on
OssoConfigFile /u01/ohs/ohs/conf/osso/services_osso.conf
<Location /owc_discussions>
Require valid-user
AuthType Basic
</Location>
<Location /owc_discussions>
Require valid-user
AuthType Basic
</Location>
<Location /private>
require valid-user
AuthType Basic
</Location>
</IfModule>
#
# If you would like to have short hostnames redirected to
# fully qualified hostnames to allow clients that need
# authentication via mod_osso to be able to enter short
# hostnames into their browsers uncomment out the following
# lines
#
#PerlModule Apache::ShortHostnameRedirect
#PerlHeaderParserHandler Apache::ShortHostnameRedirect
</VirtualHost>
$ORACLE_HOME/ohs/conf/wcconsole.conf
====================================
<VirtualHost *:7777>
ServerName linux2.com
<IfModule mod_weblogic.c>
WebLogicHost linux1.com
WebLogicPort 7001
<Location /console>
SetHandler weblogic-handler
</Location>
<Location /em>
SetHandler weblogic-handler
</Location>
</IfModule>
LoadModule osso_module modules/mod_osso.so
<IfModule mod_osso.c>
OssoIdleTimeout on
OssoIpCheck off
#OssoRedirectByForm off
#OssoSecureCookies on
#OssoProtectedOnly on
#OssoSecureCookies on
#OssoSendCacheHeaders on
OssoSendCacheHeaders off
#OssoHttpsFrontend on
#UseWebCacheIp on
OssoConfigFile /u01/ohs/ohs/conf/osso/console_osso.conf
<Location /console>
Require valid-user
AuthType Basic
</Location>
<Location /em>
Require valid-user
AuthType Basic
</Location>
<Location /private>
require valid-user
AuthType Basic
</Location>
</IfModule>
#
# If you would like to have short hostnames redirected to
# fully qualified hostnames to allow clients that need
# authentication via mod_osso to be able to enter short
# hostnames into their browsers uncomment out the following
# lines
#
#PerlModule Apache::ShortHostnameRedirect
#PerlHeaderParserHandler Apache::ShortHostnameRedirect
</VirtualHost>
Step 5. Optionally you can configure filter in webcenter domain.
Related Links
Weblogic Server : 10.3.3
Linux : RHEL update 4
Prerequisites
1. CPU : 1GHZ
2. RAM : 1GB RAM
3. JDK or JRE : 1.6 ( Weblogic Server (WLS) version for Linux and Windows ships with JAVA 1.6 and Oracle JRockit).
1. Download Weblogic Server 10.3.3 from Oracle.
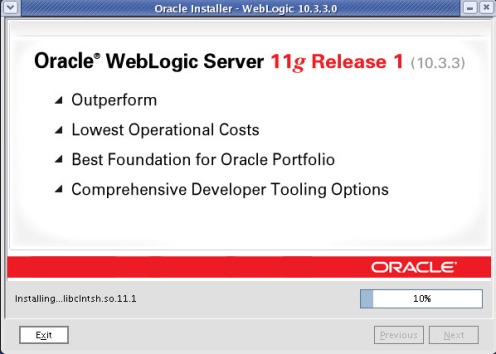
2. Run the bin file
./wls1033_oepe111150_linux32.bin
3. Verifying the Java version
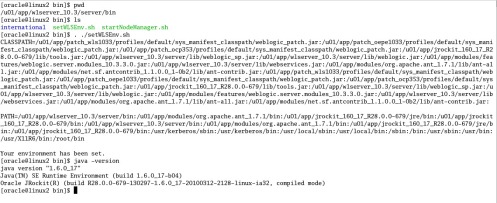
Above binary file used for installation of weblogic server ships with JDK 1.6 and JRockit
cd $MW_HOME/wls_10.3/server/bin
$ run . ./setWLSEnv.sh
$ java -version
4. Files to look in Middleware Home
1. log.txt has installed components with Weblogic Server——— cd $MW_HOME/logs
2. registry.xml ========in $MW_HOME
?xml version=”1.0″ encoding=”UTF-8″?>
<bea-product-information xmlns:fo=”http://www.w3.org/1999/XSL/Format” xmlns:gpr=”http://www.bea.com/ns/cie/gpr”>
<host home=”/u01/app” name=”linux2.linux.com”>
<product format=”1.0″ name=”WebLogic Platform”>
<release level=”10.3″ ServicePackLevel=”3″ PatchLevel=”0″ Status=”installed” InstallTime=”Aug 22, 2010 2:59:55 PM” InstallDir=”/u01/app” JavaHome=”/u01/app/jrockit_160_17_R28.0.0-679″ JavaVersion=”1.6.0_17″ JavaVendor=”Oracle”>
<component name=”Common Infrastructure Engineering” version=”7.0.0.0″ InstallDir=””>
<component name=”Uninstall”/>
<component name=”Patch Client”/>
<component name=”Patch Attachment Facility”/>
<component name=”Clone Facility”/>
</component>
<component name=”WebLogic Server” version=”10.3.3.0″ InstallDir=”/u01/app/wlserver_10.3″>
<component name=”Core Application Server”/>
<component name=”Administration Console”/>
<component name=”Configuration Wizard and Upgrade Framework”/>
<component name=”Web 2.0 HTTP Pub-Sub Server”/>
<component name=”WebLogic SCA”/>
<component name=”WebLogic JDBC Drivers”/>
<component name=”Third Party JDBC Drivers”/>
<component name=”WebLogic Server Clients”/>
<component name=”WebLogic Web Server Plugins”/>
<component name=”UDDI and Xquery Support”/>
<component name=”Evaluation Database”/>
<component name=”Workshop Code Completion Support”/>
</component>
<component name=”Oracle Configuration Manager” version=”10.3.2.1″ InstallDir=””>
<component name=”Data Collector”/>
</component>
<component name=”Oracle Coherence” version=”3.5.3.2″ InstallDir=”/u01/app/coherence_3.5″>
<component name=”Coherence Product Files”/>
</component>
<component name=”Oracle Enterprise Pack for Eclipse” version=”10.3.3.0″ InstallDir=”/u01/app/oepe_11gR1PS2″>
<component name=”Common Files”/>
</component>
</release>
</product>
<java-installation Name=”jdk160_18″ JavaHome=”/u01/app/jdk160_18″ JavaVersion=”1.6.0_18″ JavaVendor=”Sun” Architecture=”32″ Platform=”linux”>
<dependent-product Name=”WebLogic Platform” Version=”10.3.3.0″/>
</java-installation>
<java-installation Name=”jrockit_160_17_R28.0.0-679″ JavaHome=”/u01/app/jrockit_160_17_R28.0.0-679″ JavaVersion=”1.6.0_17″ JavaVendor=”Oracle” Architecture=”32″ Platform=”linux”>
<dependent-product Name=”WebLogic Platform” Version=”10.3.3.0″/>
</java-installation>
</host>
</bea-product-information>
References :
1. Weblogic Server Installation Guide
Related Links
2. Configuring Oracle Single Sign-on for Weblogic Server
There are 2 different type of servers in Weblogic Server
1. Admin Server
2. Managed Server
Increasing JVM Size of Admin Server
JVM size of Admin server can be increased by changing Xmx and Xms values in setDomainEnv.sh which is located in $MW_HOME/user_projects/domains/<Domain>/bin
There are two blocks for XMX and XMS in setDomainEnv.sh. Depending up on type of JVM make changes in second block. Below I changed the value of XMX and XMS of 64 Bit SUN Java to 2048 and 1024.
XMS_SUN_64BIT=”256″
export XMS_SUN_64BIT
XMS_SUN_32BIT=”256″
export XMS_SUN_32BIT
XMX_SUN_64BIT=”512″
export XMX_SUN_64BIT
XMX_SUN_32BIT=”512″
export XMX_SUN_32BIT
XMS_JROCKIT_64BIT=”256″
export XMS_JROCKIT_64BIT
XMS_JROCKIT_32BIT=”256″
export XMS_JROCKIT_32BIT
XMX_JROCKIT_64BIT=”512″
export XMX_JROCKIT_64BIT
XMX_JROCKIT_32BIT=”512″
export XMX_JROCKIT_32BIT
XMS_SUN_64BIT=”1024″
export XMS_SUN_64BIT
XMS_SUN_32BIT=”512″
export XMS_SUN_32BIT
XMX_SUN_64BIT=”2048″
export XMX_SUN_64BIT
XMX_SUN_32BIT=”1024″
export XMX_SUN_32BIT
XMS_JROCKIT_64BIT=”512″
export XMS_JROCKIT_64BIT
XMS_JROCKIT_32BIT=”512″
export XMS_JROCKIT_32BIT
XMX_JROCKIT_64BIT=”1024″
export XMX_JROCKIT_64BIT
XMX_JROCKIT_32BIT=”1024″
export XMX_JROCKIT_32BIT
Increasing JVM Size of Managed Server
JVM size of Managed Server can be increased from Weblogic console. This can be achieved by adding Xmx and Xms values start tab in Managed server shown as below
Servers>>Server-0>>Start Tab>> Arguments
Related Links
1. Weblogic Server Installation
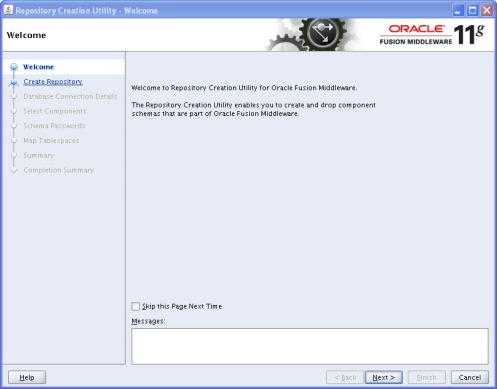
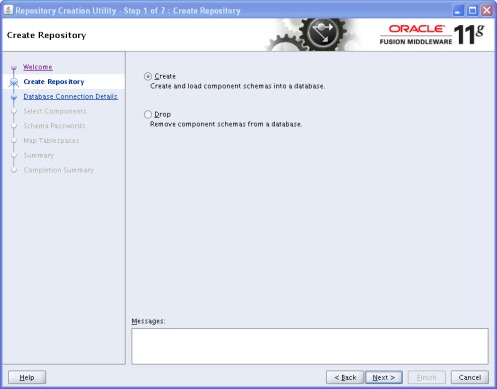
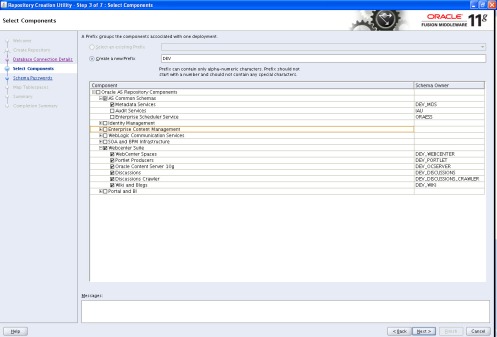
1. RCU is used to create repository for various middleware products ie. SOA Suite , Webcenter Suite , Identity Management Suite, Content Management & Weblogic Communication Services , Portal & BI
2. Prerequisites of Webcenter Schemas in a Oracle Database
1. Character Set AL32UTF8
2. NLS_LENGTH_SEMANTICS= Byte
3. Processes=300
3. RCU download is available for Windows and Linux Platforms
Download RCU from http://www.oracle.com/technetwork/middleware/downloads/fmw-11-download-092893.html File : ofm_rcu_linux_11.1.1.3.0_disk1_1of1.zip
unzip ofm_rcu_linux_11.1.1.3.0_disk1_1of1.zip
4. Launch ./rcu from cd /oracle/rcuHome/bin
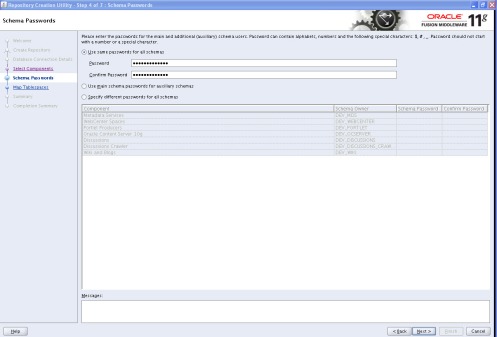
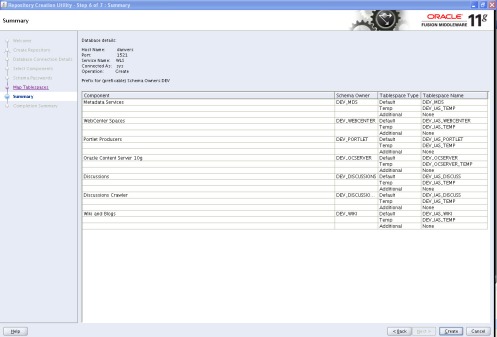
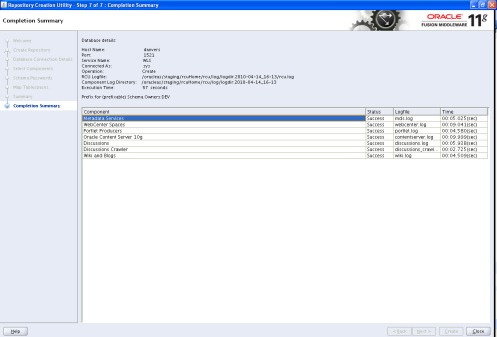
Below are the screen shots for rcu Install for Webcenter Suite
Other Links
1. Configuring Webcenter with Proxy HTTP Server and SSO
Oracle Webcenter Suite Installation on single node is straight forward
1. Run ![]() Repository Creation Utility to load webcenter schemas in database.
Repository Creation Utility to load webcenter schemas in database.
Detail Steps to Create Repository for Webcenter
2. Install Weblogic server in Middleware Home. ( ie. /u01/mwh)
3. Install Webcenter suite 11g in same Middleware Home. (ie /u01/mwh)
4. Patch Webcenter Suite to 11.1.1.3 version.
5. Run ./config.sh to create the domain and webcenter manage services.
Note : If this is new installation apply 11.1.13 Fusion Middleware patch to webcenter home before starting creating managed services.
Soon I will update this post with my experience in webcenter suite.
Other links
1. Configuring Webcenter with Proxy HTTP Server and SSO
2. Clustering Webcenter Suite 11g Services across physical machines
Worked for me on 10.3.2 and 10.3.3 (Fusion Middleware 11g)
Files invovled in changing password
1. DefaultAuthenticatorInit.ldift located in $ORACLE_HOME/user_projects/domains/YourDomainName/security
2. DefaultAuthenticatormyrealmInit.initialized located in $ORACLE_HOME/user_projects/domains/YourDomainName/servers/AdminServer/data/ldap
Weblogic Domain administrator username and password is stored in DefaultAuthenticatorInit.ldift
When Admin server is started default it checks DefaultAuthenticatorInit.ldift file for authentication.
Steps to recover password
1. Setting environment for the domain you want to change the password
$ cd $ORACLE_HOME/user_projects/domains/yourdomain/bin
$ . ./setDomainEnv.sh
2. shutdown the WLS Admin server.
$cd $ORACLE_HOME/user_projects/domains/yourdomain/bin
$sh stopWebLogic.sh
3. Change to security directory and remove DefaultAuthenticatorInit.ldift file
$cd $ORACLE_HOME/user_projects/domains/YourDomainName/security
$rm DefaultAuthenticatorInit.ldift
4. create DefaultAuthenticatorInit.ldift file in security folder
$cd $ORACLE_HOME/user_projects/domains/YourDomainName/security
$java weblogic.security.utils.AdminAccount weblogic weblogicadmin .
(Dot in the end of the above line indicates current directory)
Above java command creates DefaultAuthenticatorInit.ldift file
5. Delete DefaultAuthenticatormyrealmInit.initialized in $ORACLE_HOME/user_projects/domains/YourDomainName/servers/AdminServer/data/ldap
6. Start the weblogic server cd $ORACLE_HOME/user_projects/domains/YourDomainName/bin
$sh startWebLogic.sh
7. Want to put startWebLogic.sh in nohup then you need to change the password in boot.properties files
boot.properties which you need to change is located in $ORACLE_HOME/user_projects/domains/YourDomainName/servers/AdminServer/security/
If you dont have security directory in Adminserver create one and touch boot.properties file and add username and password of webloigic administrator
password=XXXXXXXXXXXXXXXx
username=weblogic
Reference : 638357.1 E-WL: WebLogic 8.1 – Loss of Administrator Password
Related Links
1. Weblogic Server Installation
This post will show a way to enable oracle single sigon(SSO) on Oracle Weblogic Server(10.3.0)
Prerequisites
1. You have installed Oracle HTTP Server 2.0 & Oracle Weblogic Server 10.3 with application deployed.
You can download Oracle HTTP Server 2.0 from Oracle 10gR3 Companion Disc
http://www.oracle.com/technology/software/products/ias/htdocs/101310.html
2. Single Sign on Server & OID 10.1.2
Download and Configure MOD_WEBLOGIC
a. Download MOD_WEBLOGIC from http://download.oracle.com/otn/bea/weblogic/server103/server103_apacheplugins.zip.
b. extract the corresponding platform mod_wl_20.so. Copy it to $ORACLE_HOME/ohs/modules.
c. Edit $ORACLE_HOME/ohs/conf/httpd.conf and add the following line under the last LoadModule directive: LoadModule weblogic_module modules/mod_wl_20.so
d. At the end of $ORACLE_HOME/ohs/conf/httpd.conf file add the following directives
<IfModule mod_weblogic.c>
WebLogicHost linux2.oracle.com
WebLogicPort 7001 (this should match with HTTP Server port where Weblogic Server is running)
<Location /sample>
SetHandler weblogic-handler
</Location>
e. Stop and start the HTTP_Server to pick up the changes.
Configure MOD_OSSO.
a. Manually register the application url with SSO
$ORACLE_HOME/sso/bin/ssoreg.sh -oracle_home_path $ORACLE_HOME -site_name linux2.oracle.com -config_mod_osso TRUE -mod_osso_url http://linux2.oracle.com:7010 -verbose TRUE ( Place the conf file in target Apache/conf/osso/
b. Add below line in $ORACLE_HOME/ohs/conf/httpd.conf
LoadModule osso_module modules/mod_osso.so (Should be on TOP in DSO section).
c. Edit $ORACLE_HOME/ohs/conf/mod_osso.conf and lines to look like
<IfModule mod_osso.c>
OssoIdleTimeout off
OssoIpCheck off
#OssoRedirectByForm off
#OssoSecureCookies on
#OssoProtectedOnly on
#OssoSecureCookies on
#OssoSendCacheHeaders on
#OssoHttpsFrontend on
#UseWebCacheIp on
OssoConfigFile /oracle/ohs/ohs/conf/osso/osso.conf
<Location /ssotest>
Require valid-user
AuthType Basic
</Location>
<Location /private>
AuthType Basic
Require valid-user
</Location>
</IfModule>
<Location /sample>
Require valid-user
AuthType Basic
</Location>
d. Stop and start the Weblogic HTTP_Server to pick up the changes.
Configure OSSO Identity Asserter.
Login Weblogic Server Control Console as weblogic user
a) Add following Providers to a weblogic Domain for OSSO
OSSO Identity Asserter, DefaultAuthenticator & OID Authenticator
Adding OSSO Identity Asserter
1. Click Security Realms, Default Realm Name, Providers
2.Select New under the Authentication Providers table.
3. Enter a name for the new provider, select its type, and then click OK. For example:
Name: OSSO Identity Asserter
Type: OSSOIdentityAsserter
Ok
In settings for Settings for OSSO Identity Asserter
4. Click Default Authentication Provider.
5. Set the control flag to OPTIONAL, and click Save
6. Adding OIDAuthenticator
Click New, and enter a name and type:.
Name. OID Authenticator
7. Click the provider Specific tab & specify the following settings
User Name Attribute: orcladmin(Example)
Host: The Oracle Internet Directory hostname
Group Base DN: cn=Groups,dc=cse,dc=oracle,dc=com
User Base DN: cn=users,dc=cse,dc=oracle,dc=com
Port: Oracle Internet Directory port
8. Reorder Providers After Stop & Restart WebLogic Server
b. Establishing Trust between Oracle WebLogic Server and Other Entities
1. Enter the syntax for the connection filter rules & Restart the WebLogic Server.
c. Configuring the Application for the OSSO Identity Asserter
1. Locate the web.xml file in the application EAR file.
2. Locate the auth-method for the appropriate realm and enter CLIENT-CERT. For example:
<login-config>
<auth-method>CLIENT-CERT</auth-method>
<realm-name>myRealm</realm-name>
</login-config>
3. Save the file. redeploy & restart the Application.
References:
1) Metalink ID: 796072.1 How to Integrate OHS 2.0 with MOD_WEBLOGIC and MOD_OSSO
2) Oracle Fusion Middleware Release Notes 11g Release 1
Related Links
1. Weblogic Server Installation
3. Weblogic Server Administrator password
4. Increasing the Heap Size in Weblogic Server
Other Links
1. Configuring Webcenter with Proxy HTTP Server and SSO
